
How to Configure the Blitz & NowCerts Integration
How to Configure the Blitz & NowCerts Integration
Follow the 3 steps below to create a Link between your Blitz Sales Software and your NowCerts Platform. This will allow you to send Prospects, Opportunities, as well as Insured contacts into your Blitz platform with only a few clicks.
Step 1 – Configure NowCerts Agency Profile with Blitz API and Transaction data
Step 2 – Configure Agent Profile for each NowCerts user give access to push leads into the Blitz Software.
Step 3 – In Blitz, configure Web Lead Provider settings to receive leads.
Step 1 -
Configure NowCerts Agency Profile with Blitz API and Transaction data
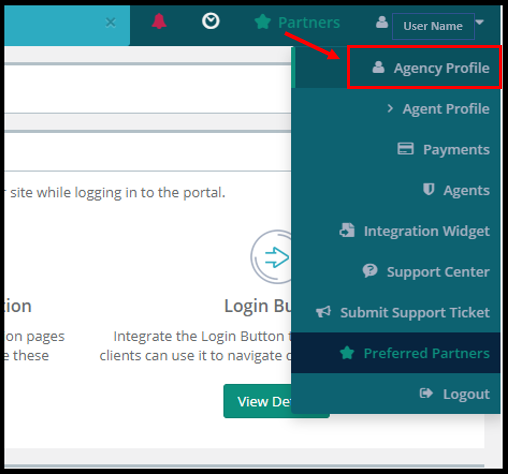
- First, Log into your NowCerts account navigate to the Agency Profile, shown below.
- Click on the upper right dropdown and select ‘Agency Profile’
- Click on the green Configure API button found in the upper right
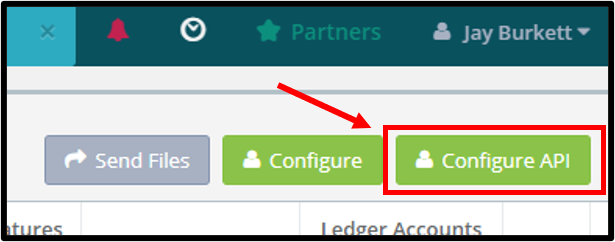
-
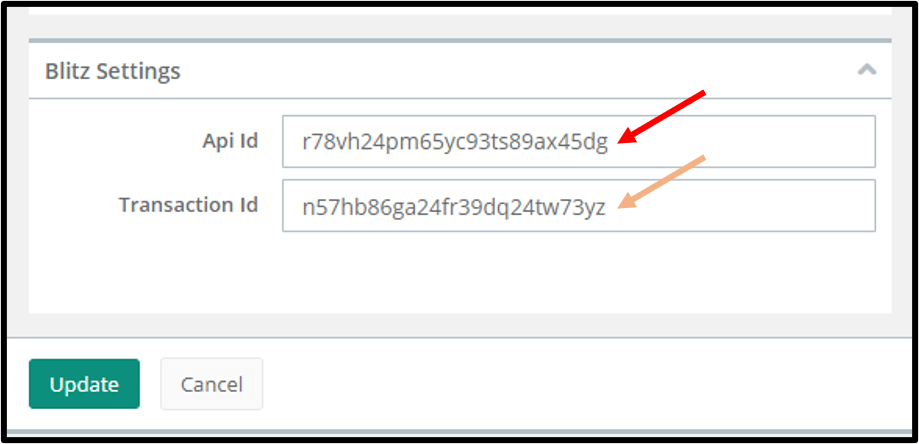
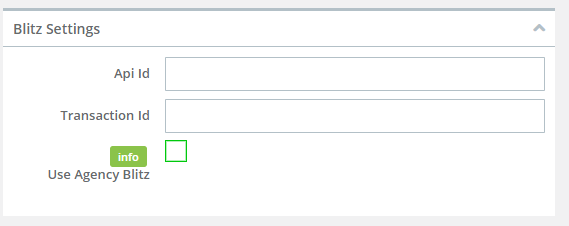
Scroll down to locate an area called ‘Blitz Settings’. At this point you will need to locate the API Id and Transaction Id from the Blitz account.

-
In a separate browser tab, Log into Blitz and navigate to Administrator > Web lead Provider
-
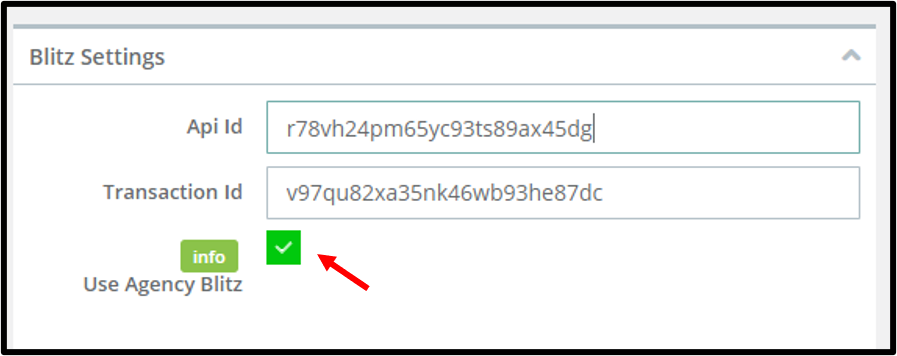
Navigate back to Blitz and copy your user account’s API Id and Transaction Id.

- Paste the API Id and Transaction Id into NowCerts and then select ‘Update’.
Step 2 -
Configure Agent Profile for each NowCerts user give access to push leads into the Blitz Software.
The Agent profile is unique to each user who has access to NowCerts.
This step should be repeated for any user who you wish to enable the integration for.
The Agent Profile setup can be complete with a click of a button if the Agency Profile is already configured from Step 1.
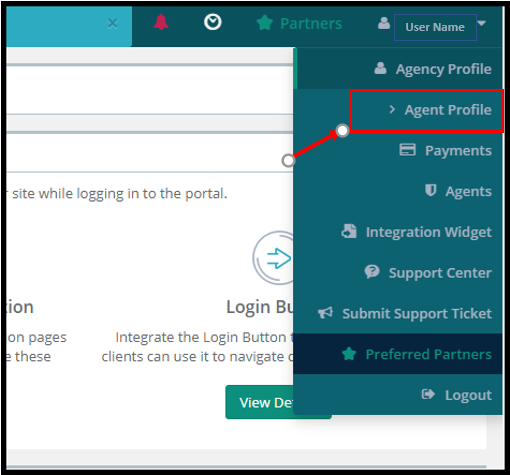
- First, Log into your NowCerts account navigate to the Agent Profile, shown below.
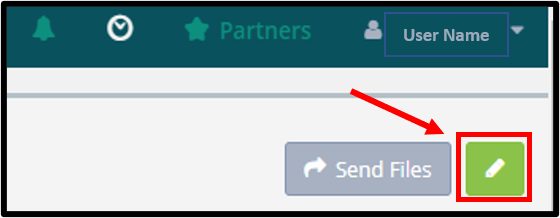
- Click on the upper right dropdown and select ‘Agent Profile’.
- Click on the Green Pencil found in the upper right.
- Scroll down to find ‘Blitz Settings’.
- Click on the Green Checkbox to configure with the Agency Profile settings in Step 1.
With Steps 1 and 2 complete, NowCerts is able to send lead data over to Blitz. However, there is nowhere for them to go once they arrive until completing the 3rd and final step.
Step 3 -
Configure Web Lead Provider settings in Blitz account to receive leads.
Configuring a Web Lead Provider in your Blitz account will create unique folders for the NowCerts Insurance Types.
This is also where the Automatic assignment is chosen to select which Blitz User is to be notified of the newly added contact.
- Navigate to Administration > Web Lead Provider
- Click the next to NowCerts.
- Check the Enable check box for each lead type you are receiving.
- Click the Save Settings button on the top right in the dark blue bar.
- Once its saved, select which folder you would like each lead type to be sent to. Click here for more information on setting-up folders.
- Next, you are able to set up an Auto Assign Group for each lead type by selecting one in the dropdown and clicking Save Settings again. You have the option to set up separate Auto Assign Groups for different lead types and providers (for example, if you have a different user that works Health leads, you could use a different Auto Assign Group that is set up for that user). Auto Assign Groups must be configured in Administration > Auto Assign Groups. If you leave this dropdown blank, the leads will not be assigned, and users can instead use the Shark Tank to claim leads. Click here for more information on assigning leads and using the Shark Tank.
- Click the Save Settings button on the top right in the dark blue bar.
Comments
0 comments
Please sign in to leave a comment.