
View Full Sized Article
Click here for FAQs about updating leads
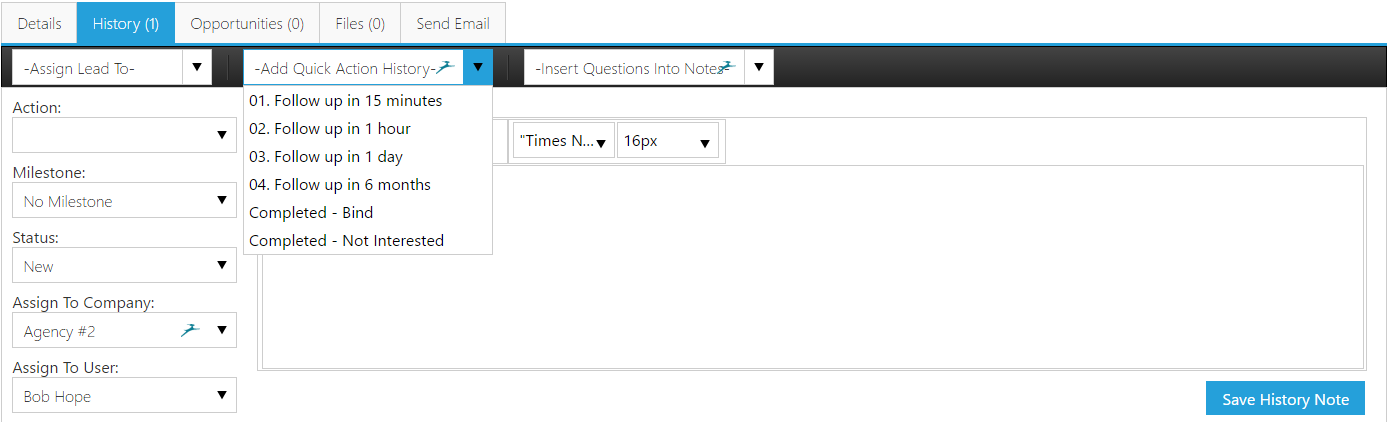
A Quick Action is a one-click solution that your staff can use to update leads more quickly. They are available in a dropdown in the lead log (see below). By selecting a Quick Action, Blitz will:
- Add a pre-written history note
- Update the Status and/or Milestone (optional)
- Add a task or follow up appointment to the schedule (optional)
- create that appointment for either the assigned user, the user submitting the quick action, or both (optional)
- Add a tag (optional)
By customizing Quick Actions, your staff will be consistent and will adopt the system more quickly.
Creating and editing Quick Actions
- Navigate to Administration > Quick Actions (Under the "History Settings" heading.)
- Click +Add New Quick Action to create a new Quick Action, the edit pencil to edit an existing Quick Action, or the garbage can to delete an existing Quick Action.
- Fill out the available fields
- Quick Action Name - This is what will appear in the drop-down (Note that this item can Tree. To learn more about treeing and organizing using Treeing, click here.)
- History Action - This will be the Action recorded for the history note.
- Notes - This is the pre-written history note that will be recorded.
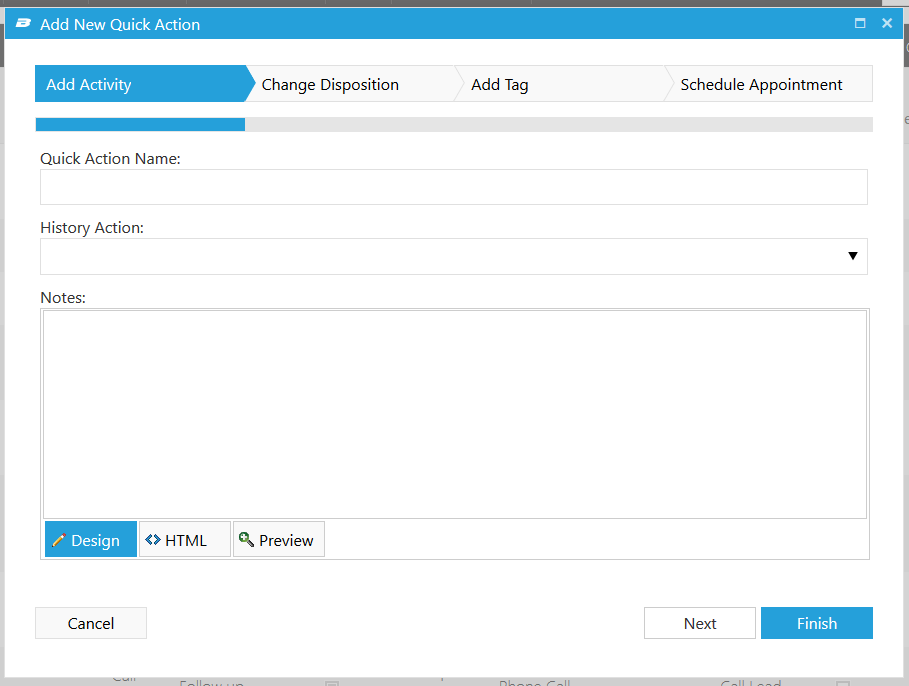
- Click Next.
- If you would like the Status and/or Milestone to change or update when this Quick Action is used, enable the checkbox, then choose a milestone and a status in the drop-down.
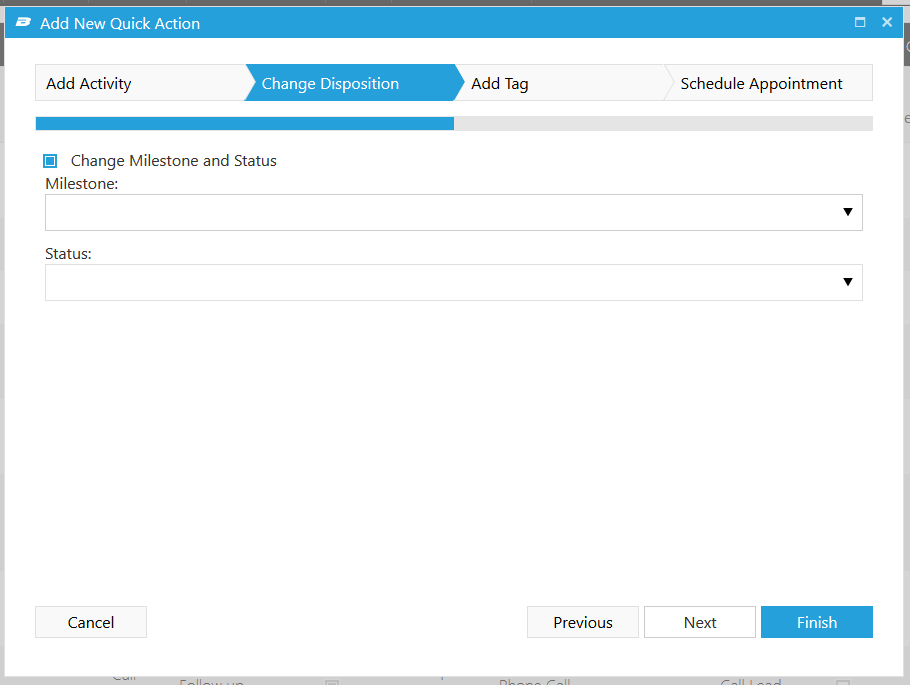
- Click next.
- If you wish to add a tag to this lead when the quick action is used, enable the checkbox, and select the intended tag from the dropdown.
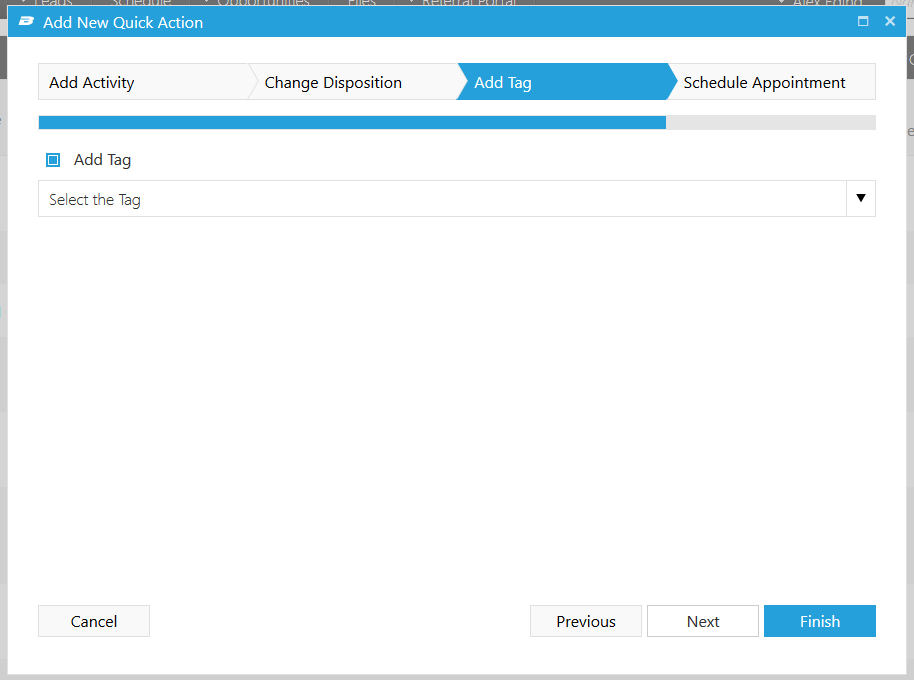
- Click next.
- If you would like the Quick Action to create an appointment, click the checkbox below labeled "Create Follow up Appointment"
- Fill out each drop-down based on the following criteria:
- Follow Up in - Required - Days or hours. Choose the increment and enter the number of days or hours chosen
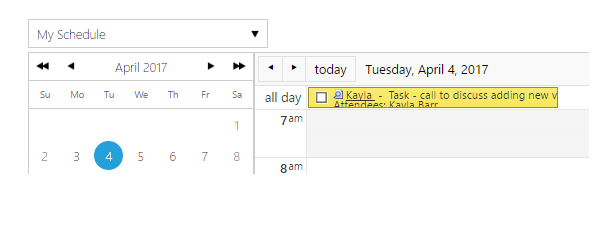
- All Day Appointment option - If you wish to make the appointment land in the "all day" section of the schedule, enable this checkbox. (see picture)
- All Day Appointment option - If you wish to make the appointment land in the "all day" section of the schedule, enable this checkbox. (see picture)
- Appointment Attendee - Required
- Assigned To User – The appointment will be added to the Assigned User’s schedule
Note: If the lead is not assigned, the Quick Action will trigger an error when used - Quick Action Author – The appointment will be added to the user’s schedule who used the Quick Action
- Assigned To User And Quick Action Author – The appointment will be added to both the Assigned User’s schedule and the user’s schedule who used the Quick Action
- Assigned To User Or Quick Action Author – By default, the appointment will be added to the Assigned User’s schedule. If the lead is not assigned or is assigned to an inactive user, the appointment will instead be added to the user’s schedule who used the Quick Action.
- Assigned To User – The appointment will be added to the Assigned User’s schedule
- Appointment Type - Required - Email, Meeting, Personal, Phone Call, Task (Color coded on schedule)
- Appointment Reminder - Optional - select a time for a notification before the appointment.
- Appointment Notes - Required - Text to display on the appointment
- Follow Up in - Required - Days or hours. Choose the increment and enter the number of days or hours chosen
- Fill out each drop-down based on the following criteria:
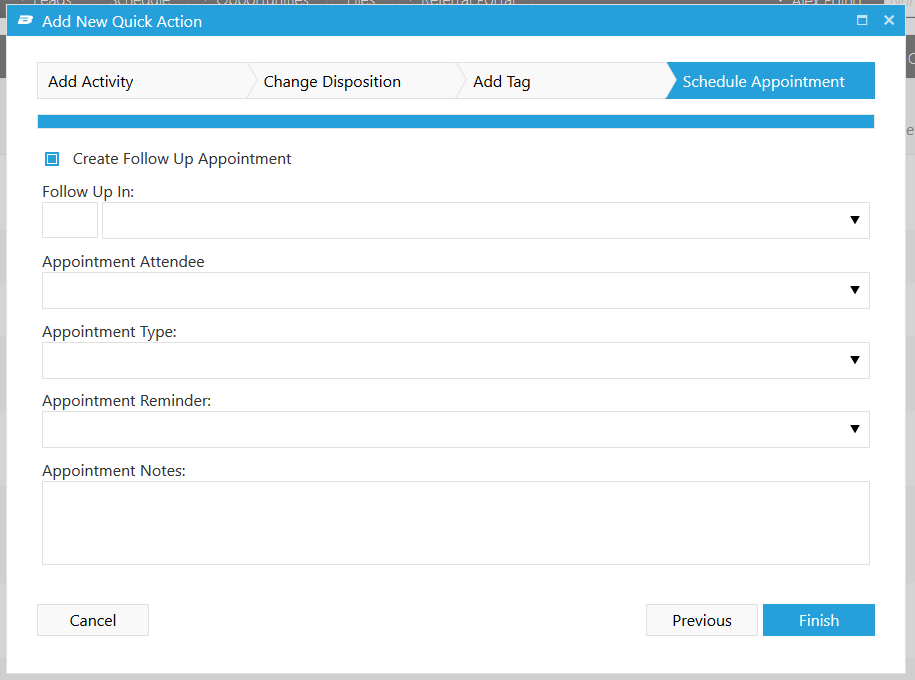
- Click Finish.
Bulk Quick Actions
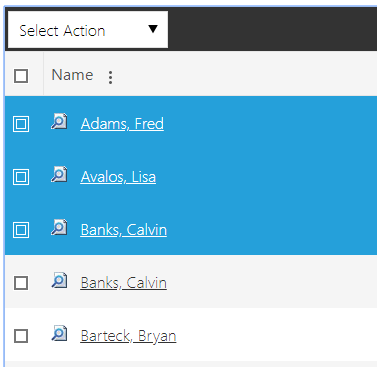
Quick Actions can be applied to multiple leads at a time using the checkboxes on the Lead List page (this is an Admin only feature).
- Open a list of leads from the Lead menu or Dashboard.
- Select the leads you would like to apply the Quick Action to. This can be done by either clicking individual check boxes next to leads, or clicking the top check box in the header bar to select all leads on the page. If all are selected, you also have the option to select all within the filtered results, as opposed to only the leads on the current page.
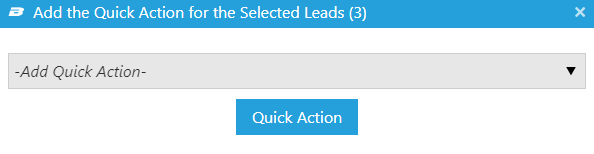
- In the “Select Action” dropdown above the selected leads, choose “Quick Action.” Select the Quick Action you would like to apply to the selected leads, and click “Quick Action.”
- If you open one of the leads, you will see the applied Quick Action in the “History” tab. Any updates within the Quick Action settings will be applied.
Comments
0 comments
Please sign in to leave a comment.